Creating and editing Pipelines requires the Admin or Manager role. Members use their teams’ Pipelines but do not see the New pipeline button.
Before you start
- Create the teams that will use the Pipeline. Pipeline access comes from the team. Create and configure teams →
- List the real stages of your process and the criterion for a deal to enter each one.
- Define won and lost reasons using the names your team already uses.
Step by step
Go to Pipelines in the sidebar and click New pipeline.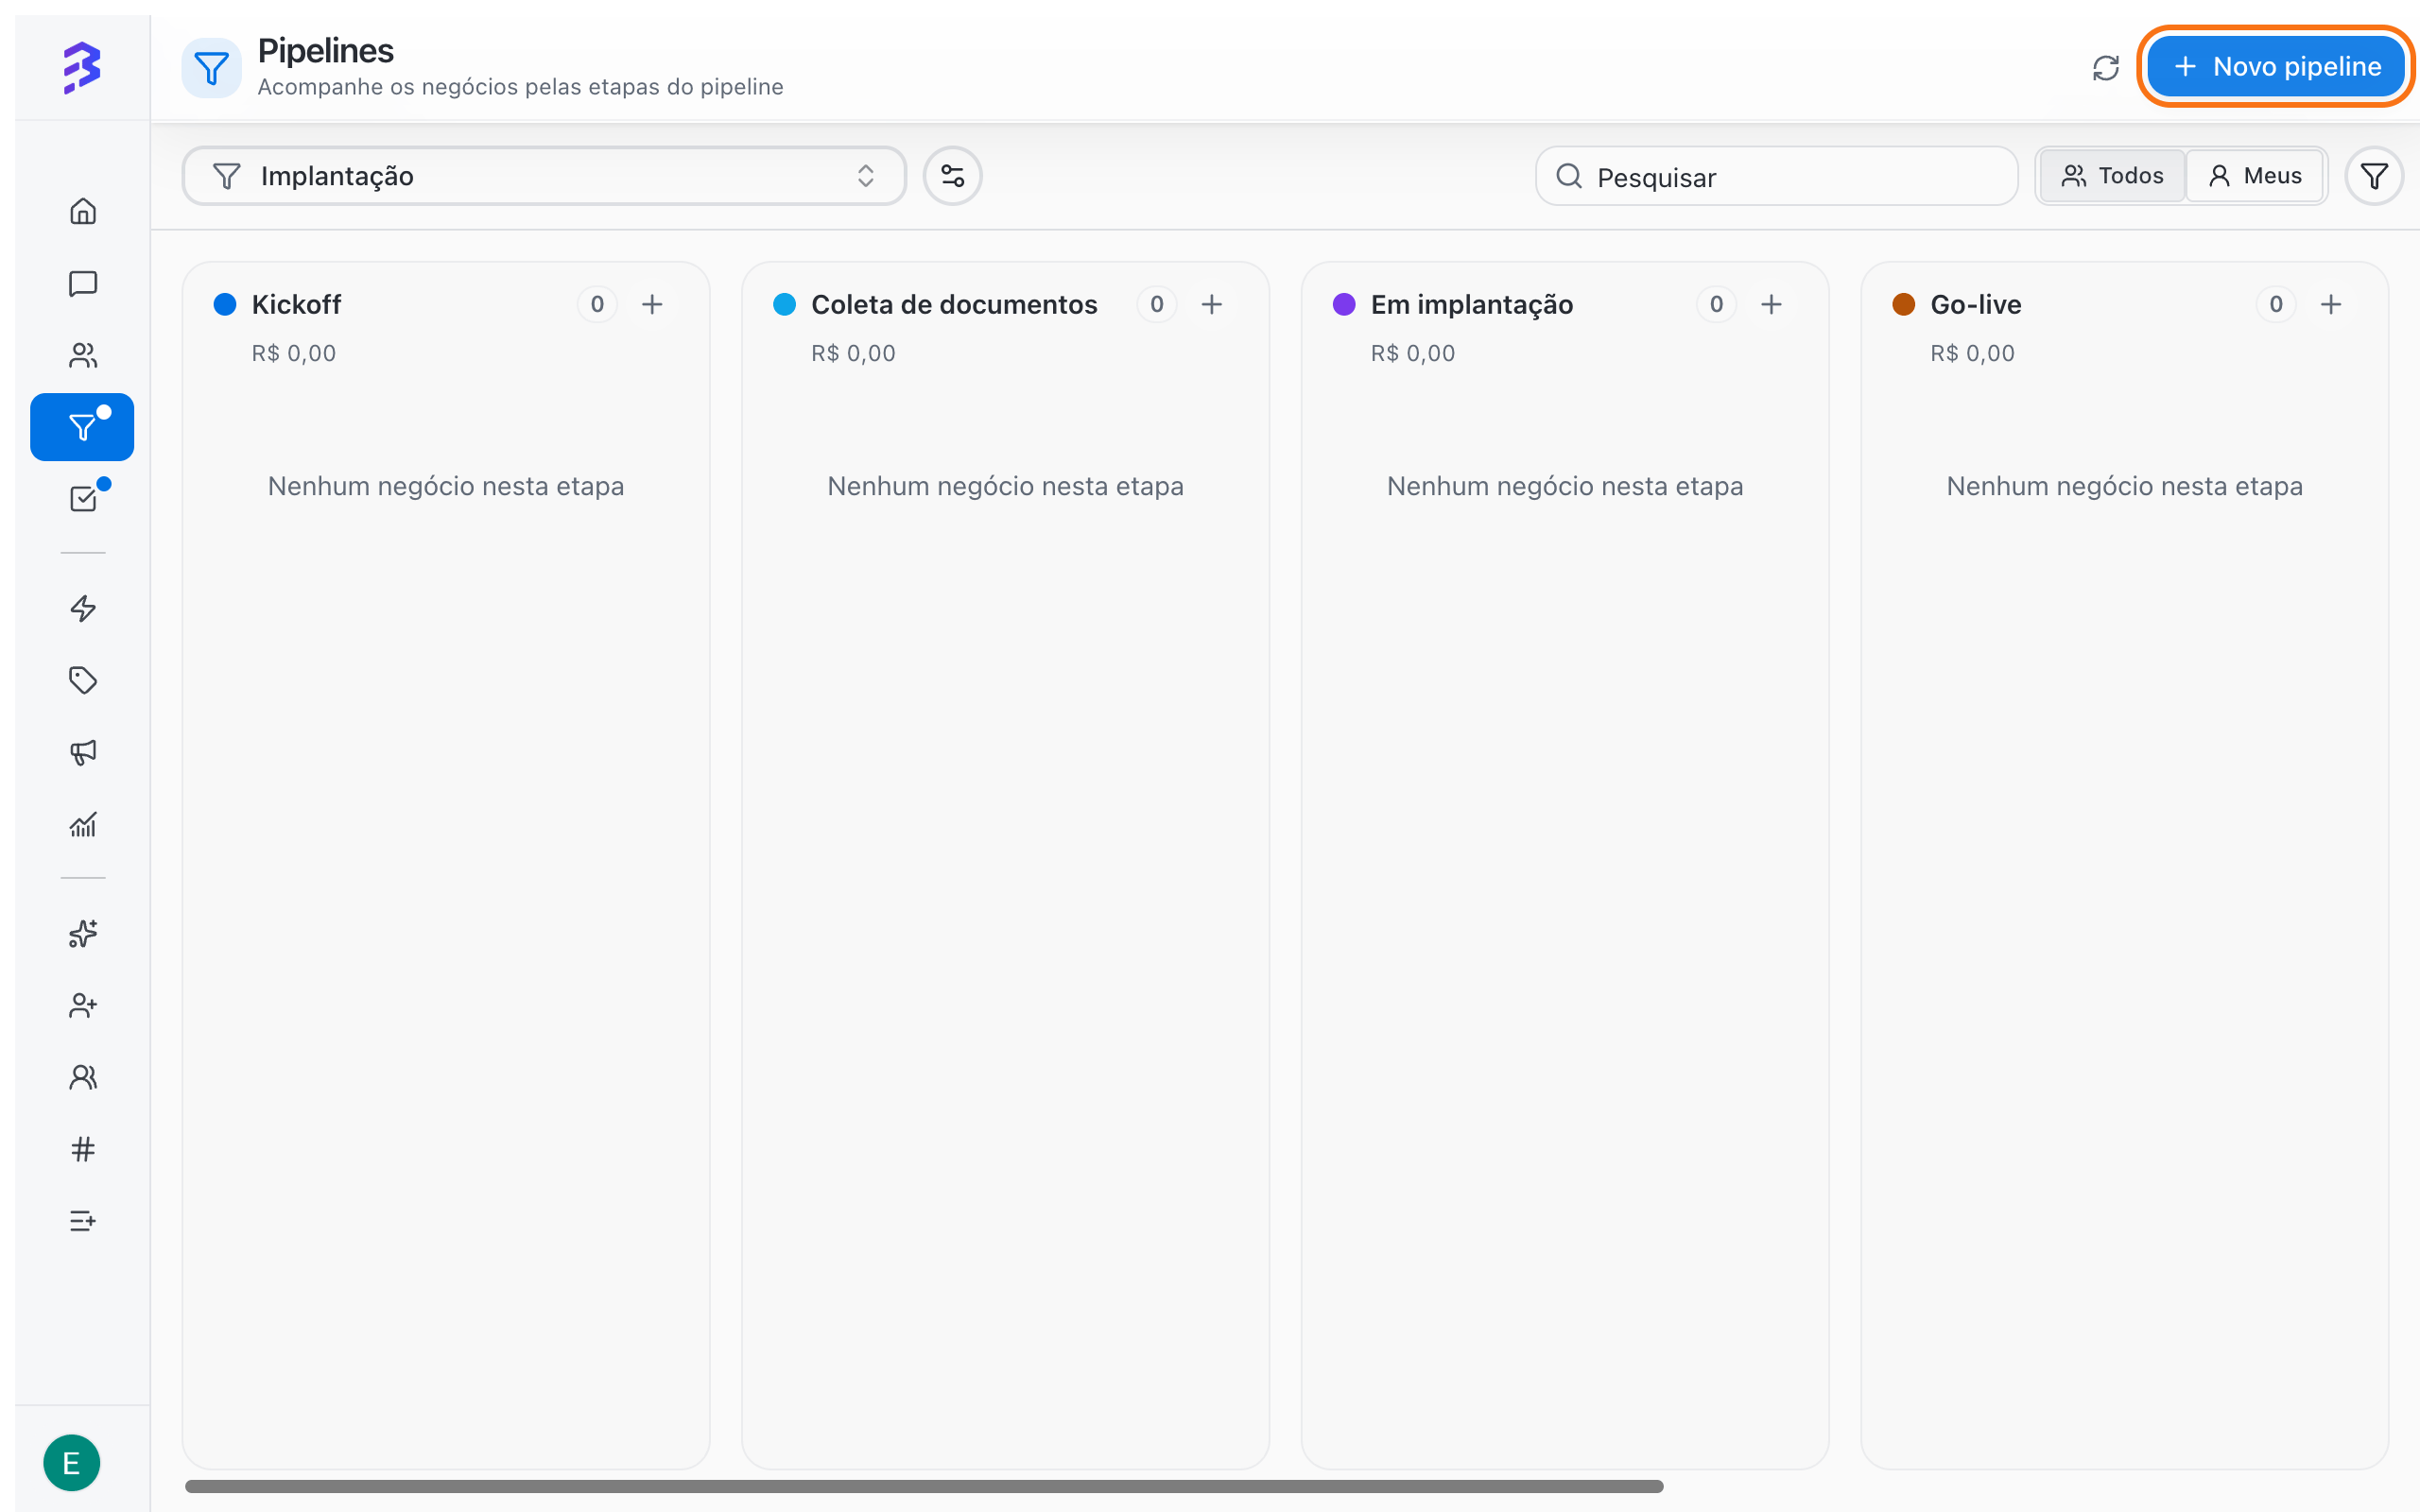
1
Type: choose a template
Under Pipeline type, choose Sales, Support, Onboarding, Collections or Custom. The template sets the starting stages, fields and reasons. You adjust everything in the next steps.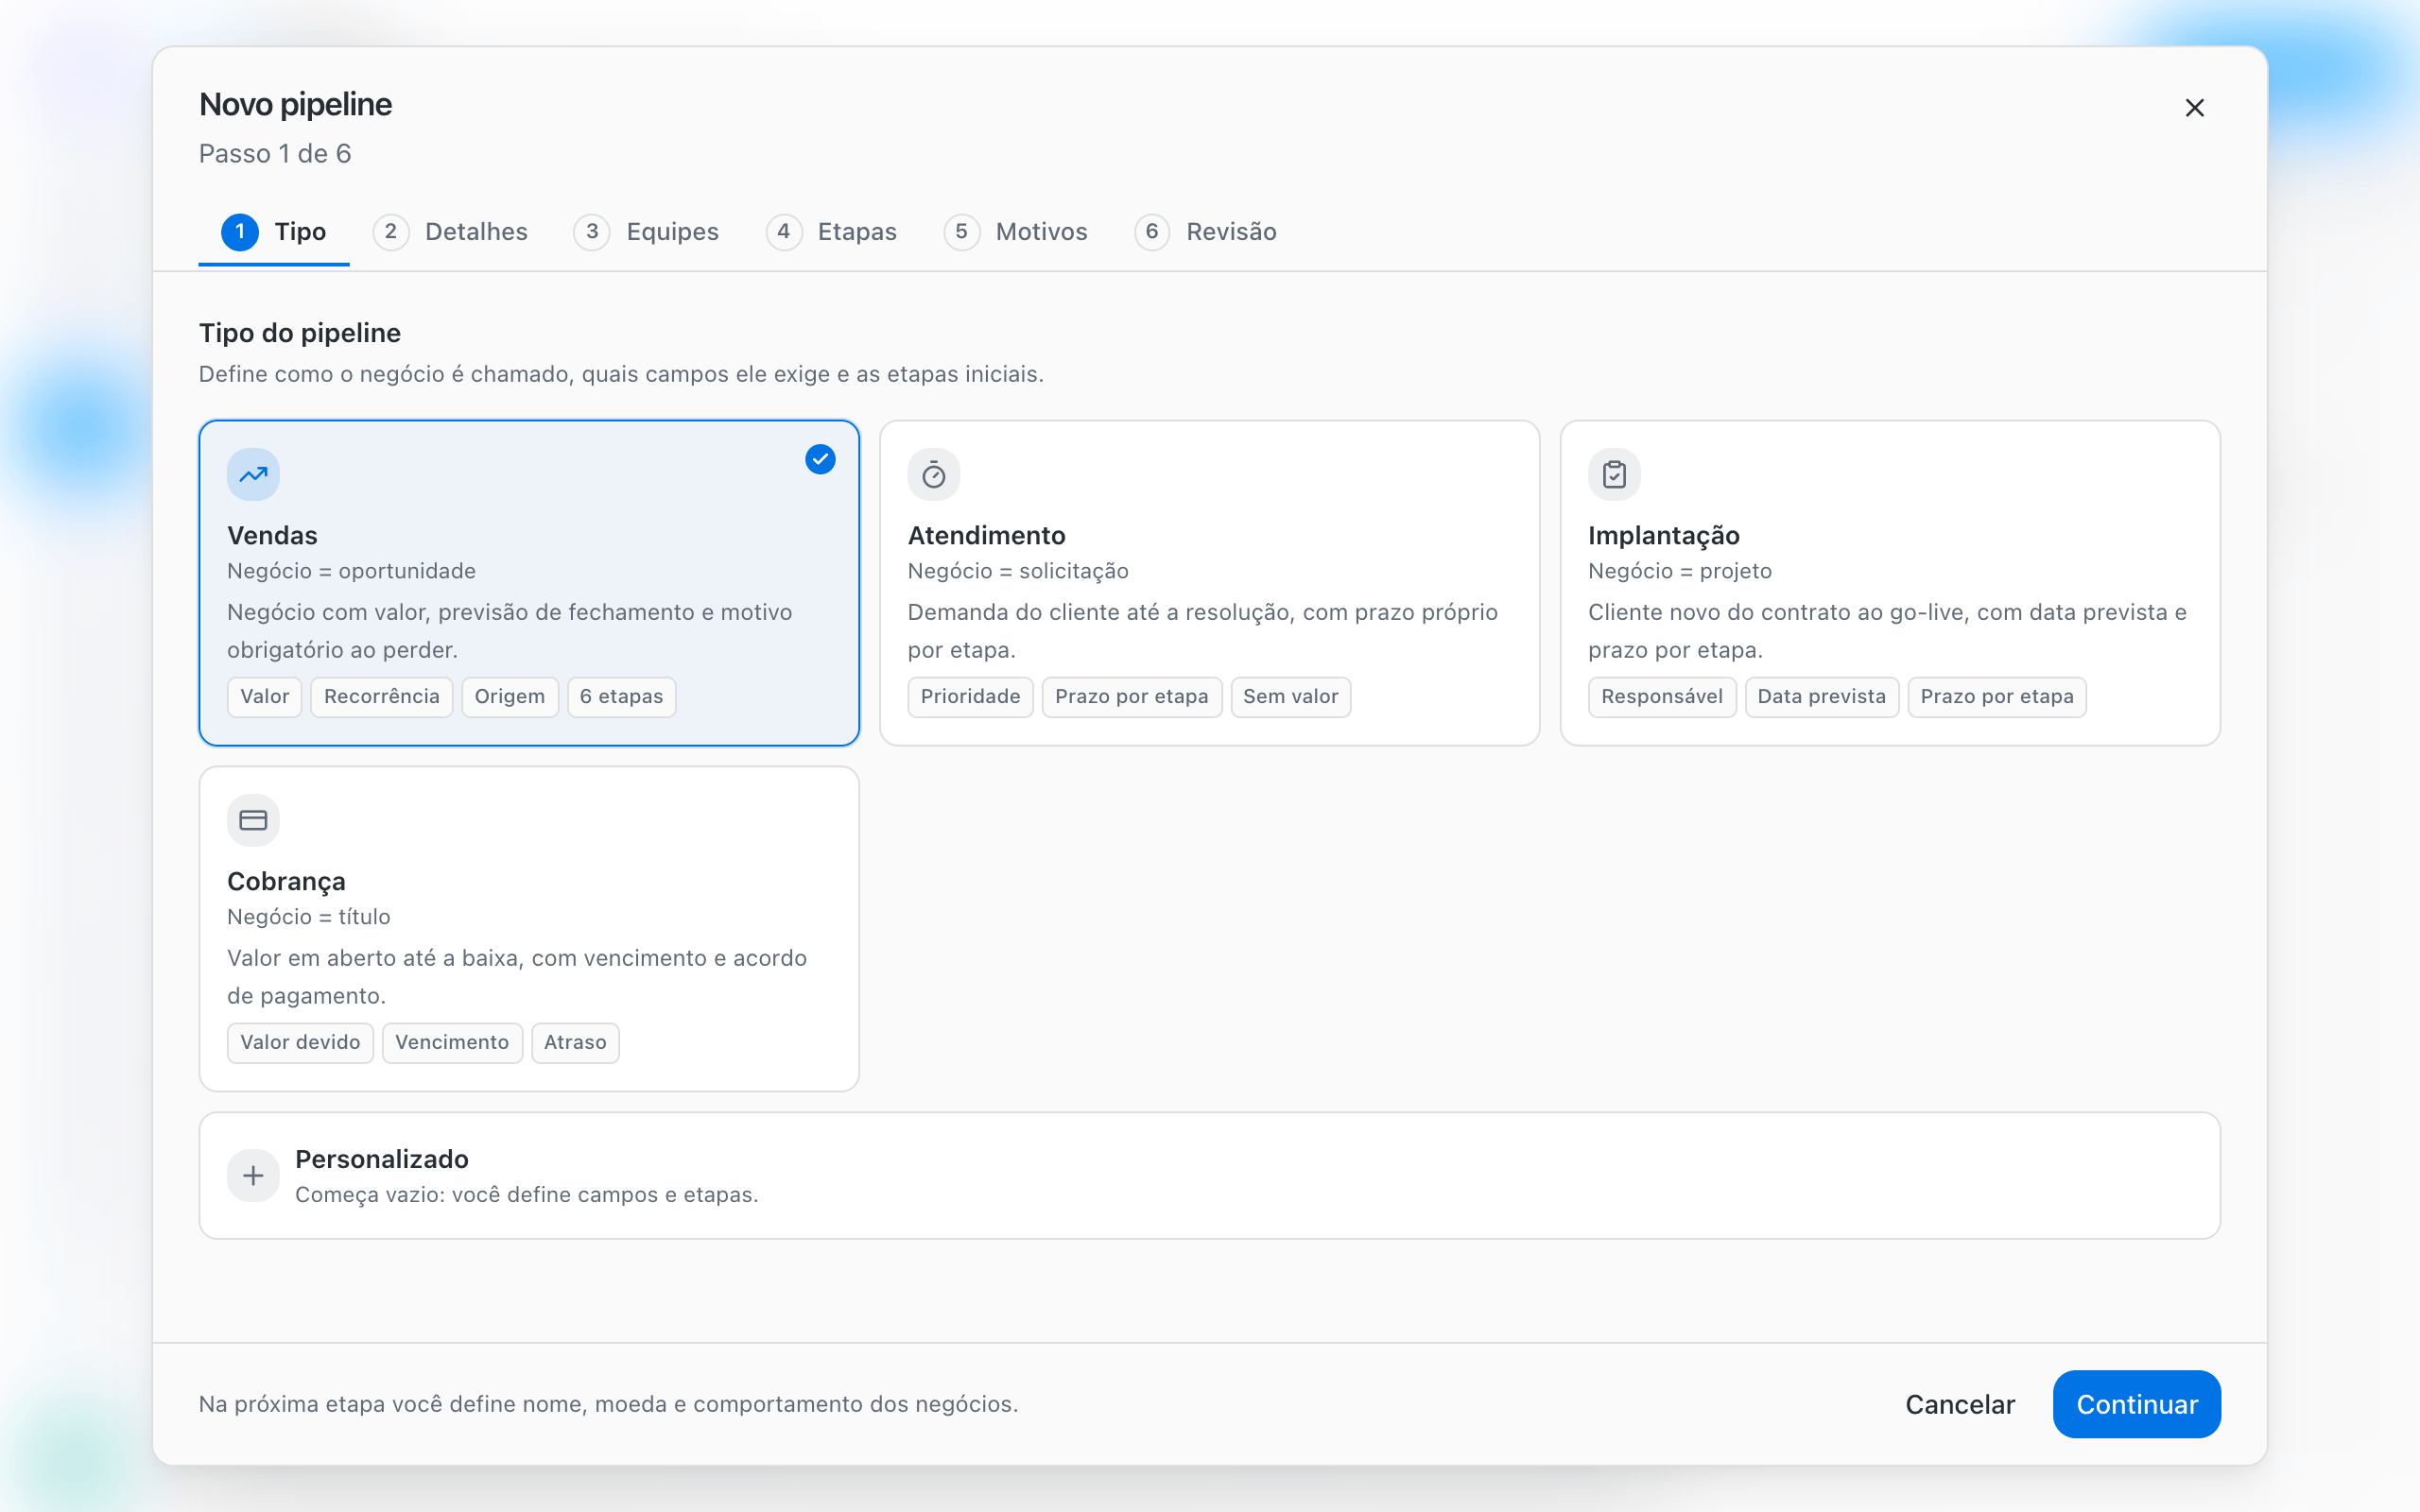
2
Details: name, description and deal fields
Enter the Pipeline name (required) and, if you want, a Description (optional) that explains what the Pipeline is for and who uses it.Under Fields and rules, enable only what fits the process: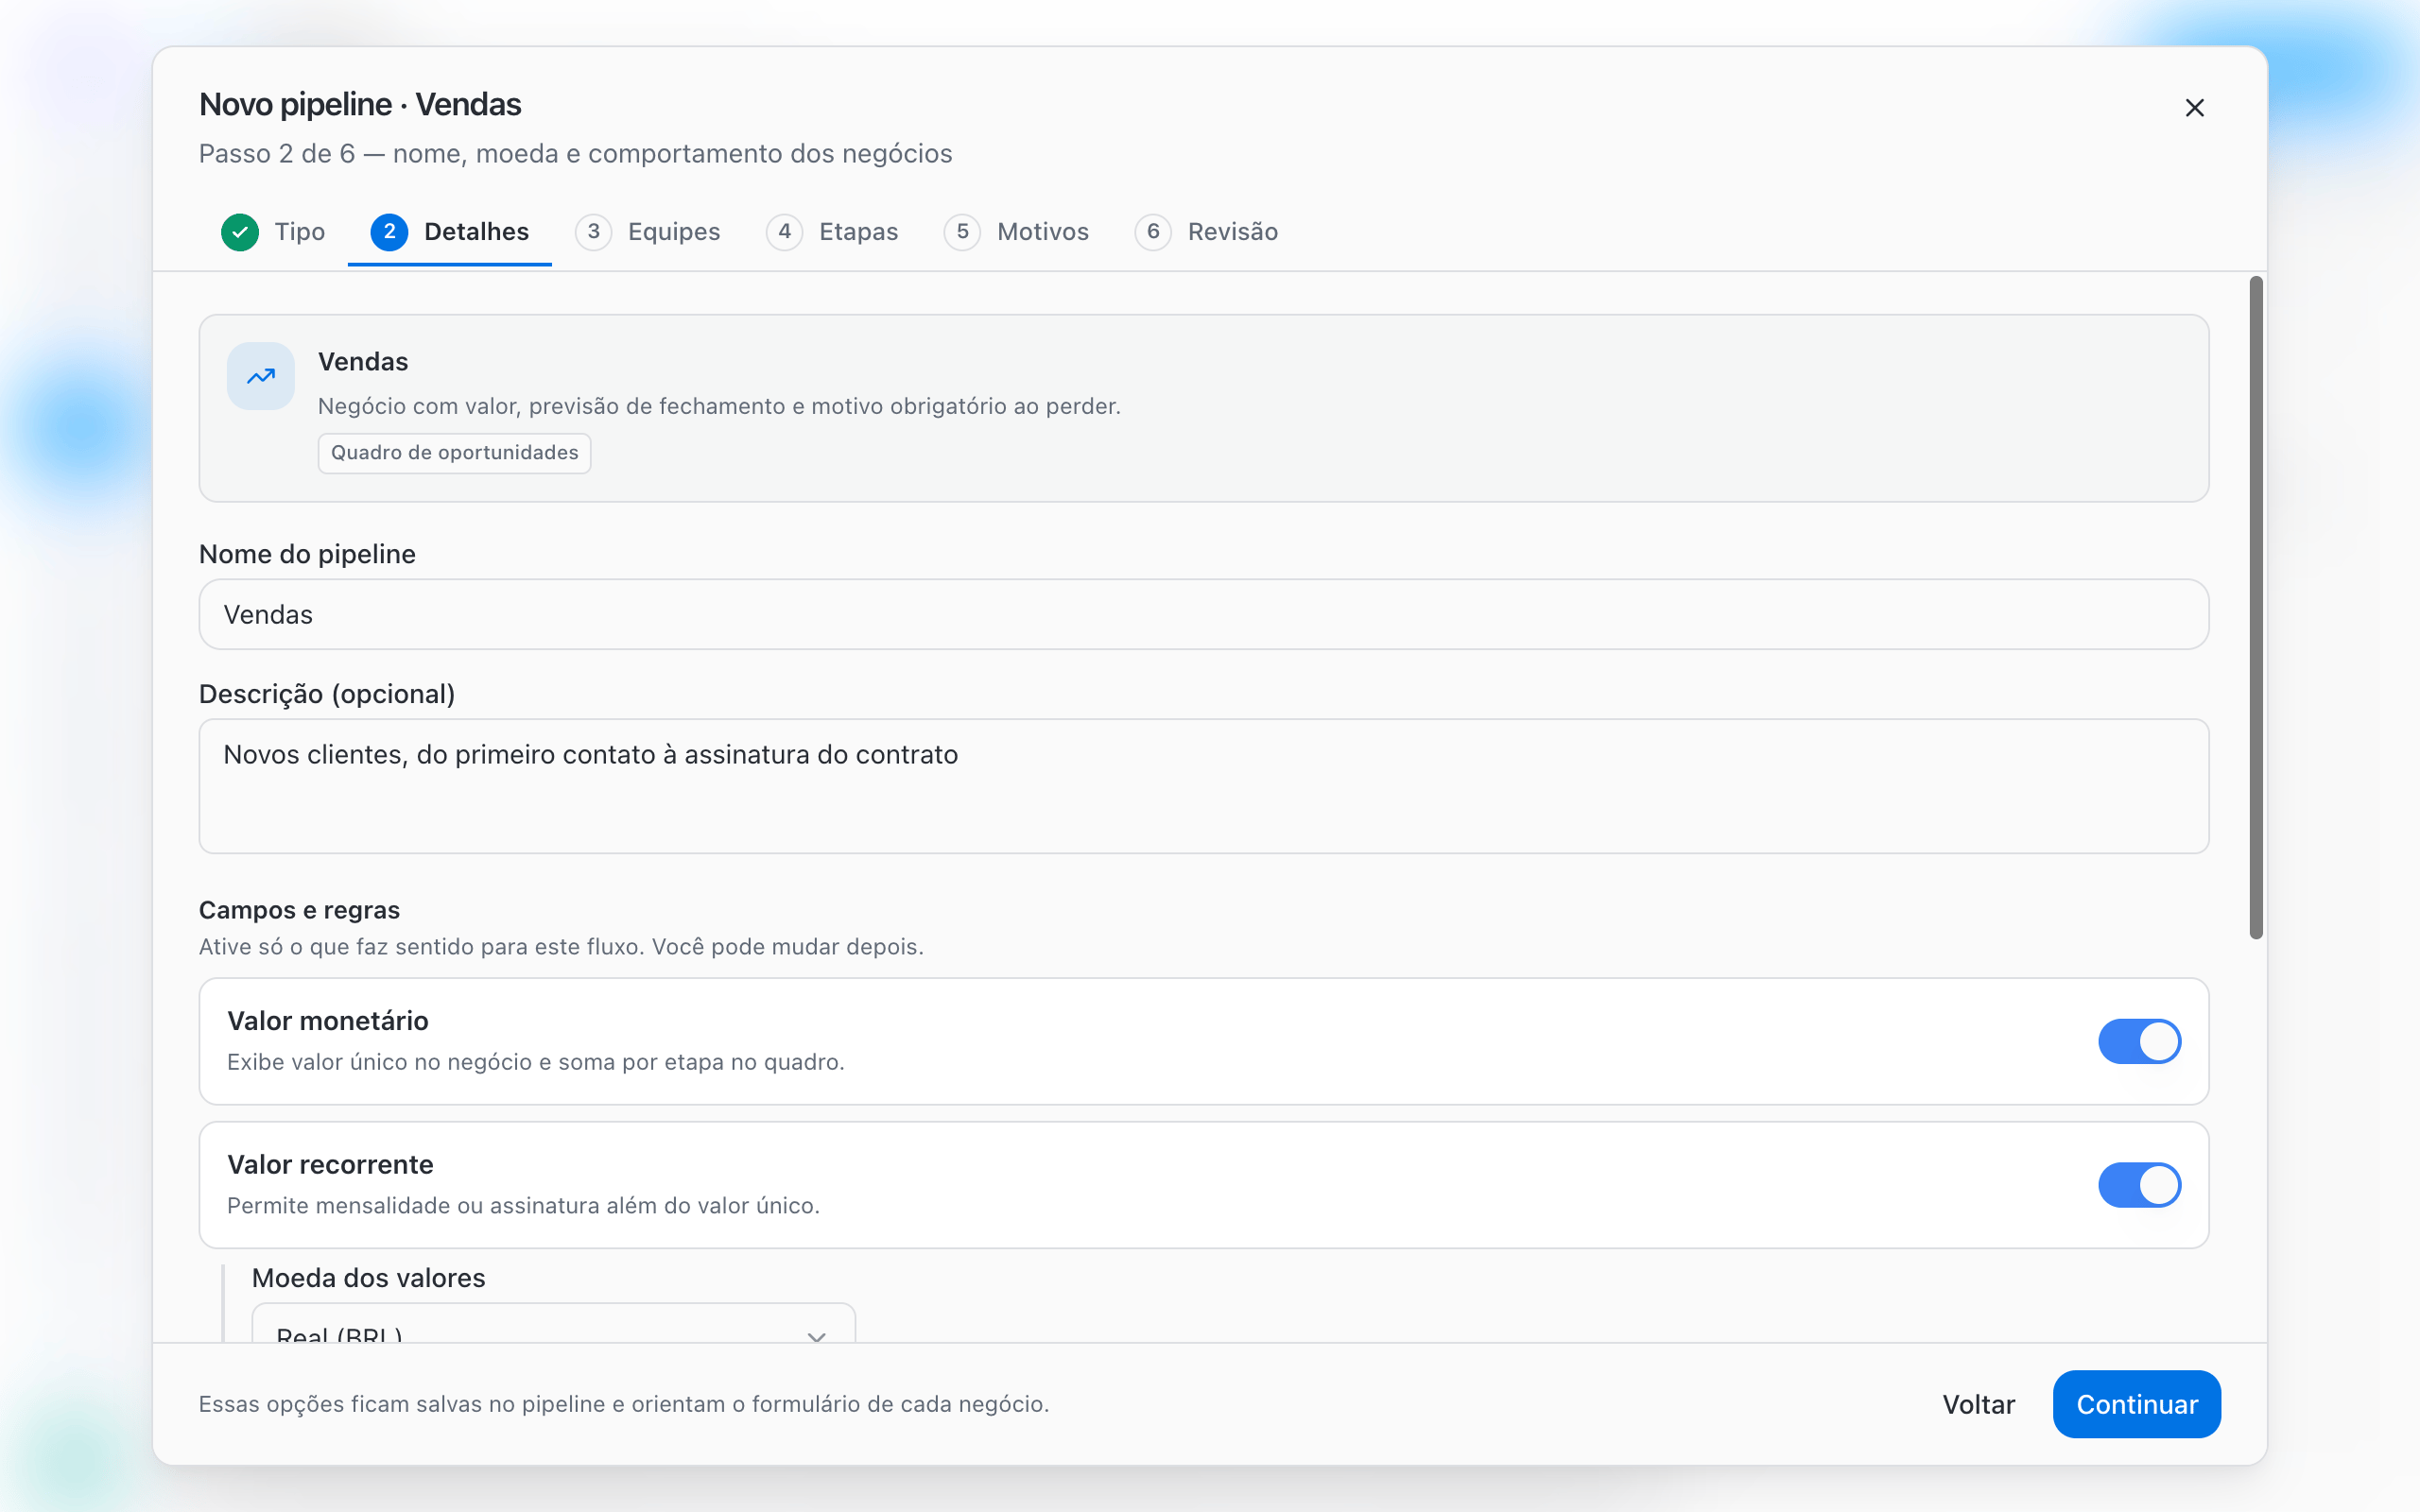
If there are no deal fields yet, use Manage deal fields to create them.
3
Teams: define who has access
Select the teams that will use the Pipeline. Access comes from the team, not the Pipeline: members of a linked team can see the Pipeline and its deals. At least one team is required to continue.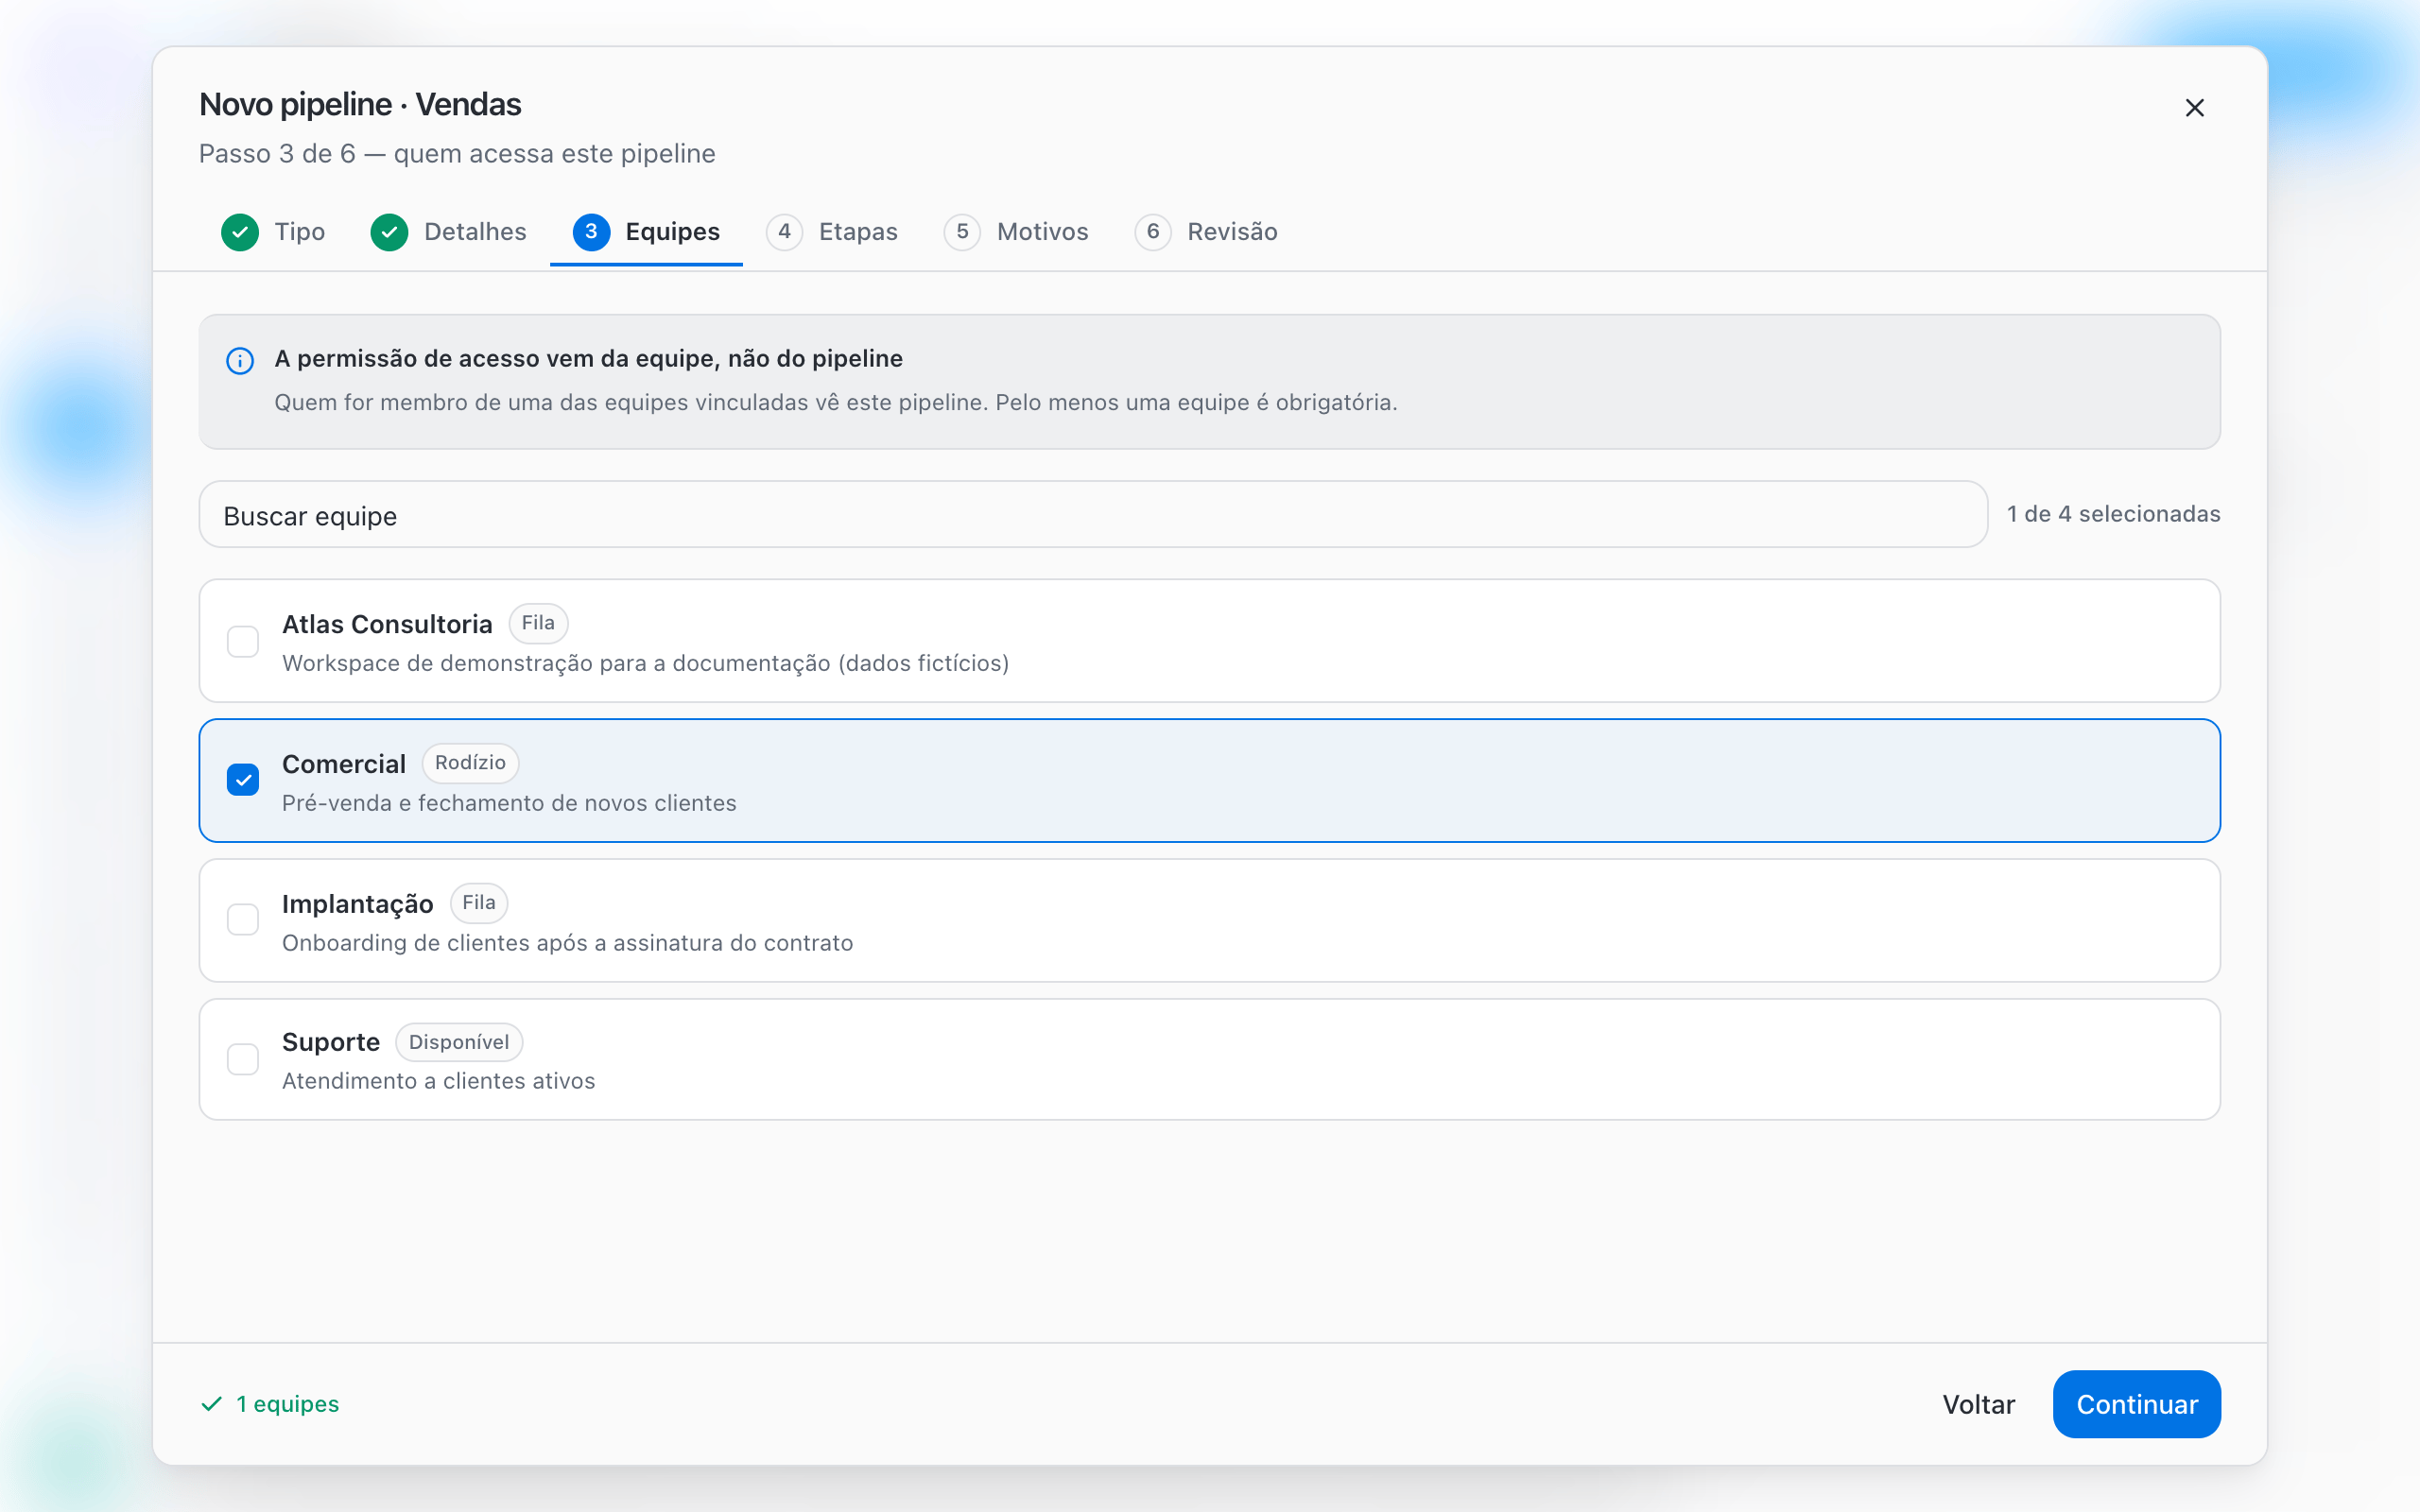
4
Stages: columns, deadlines and close destination
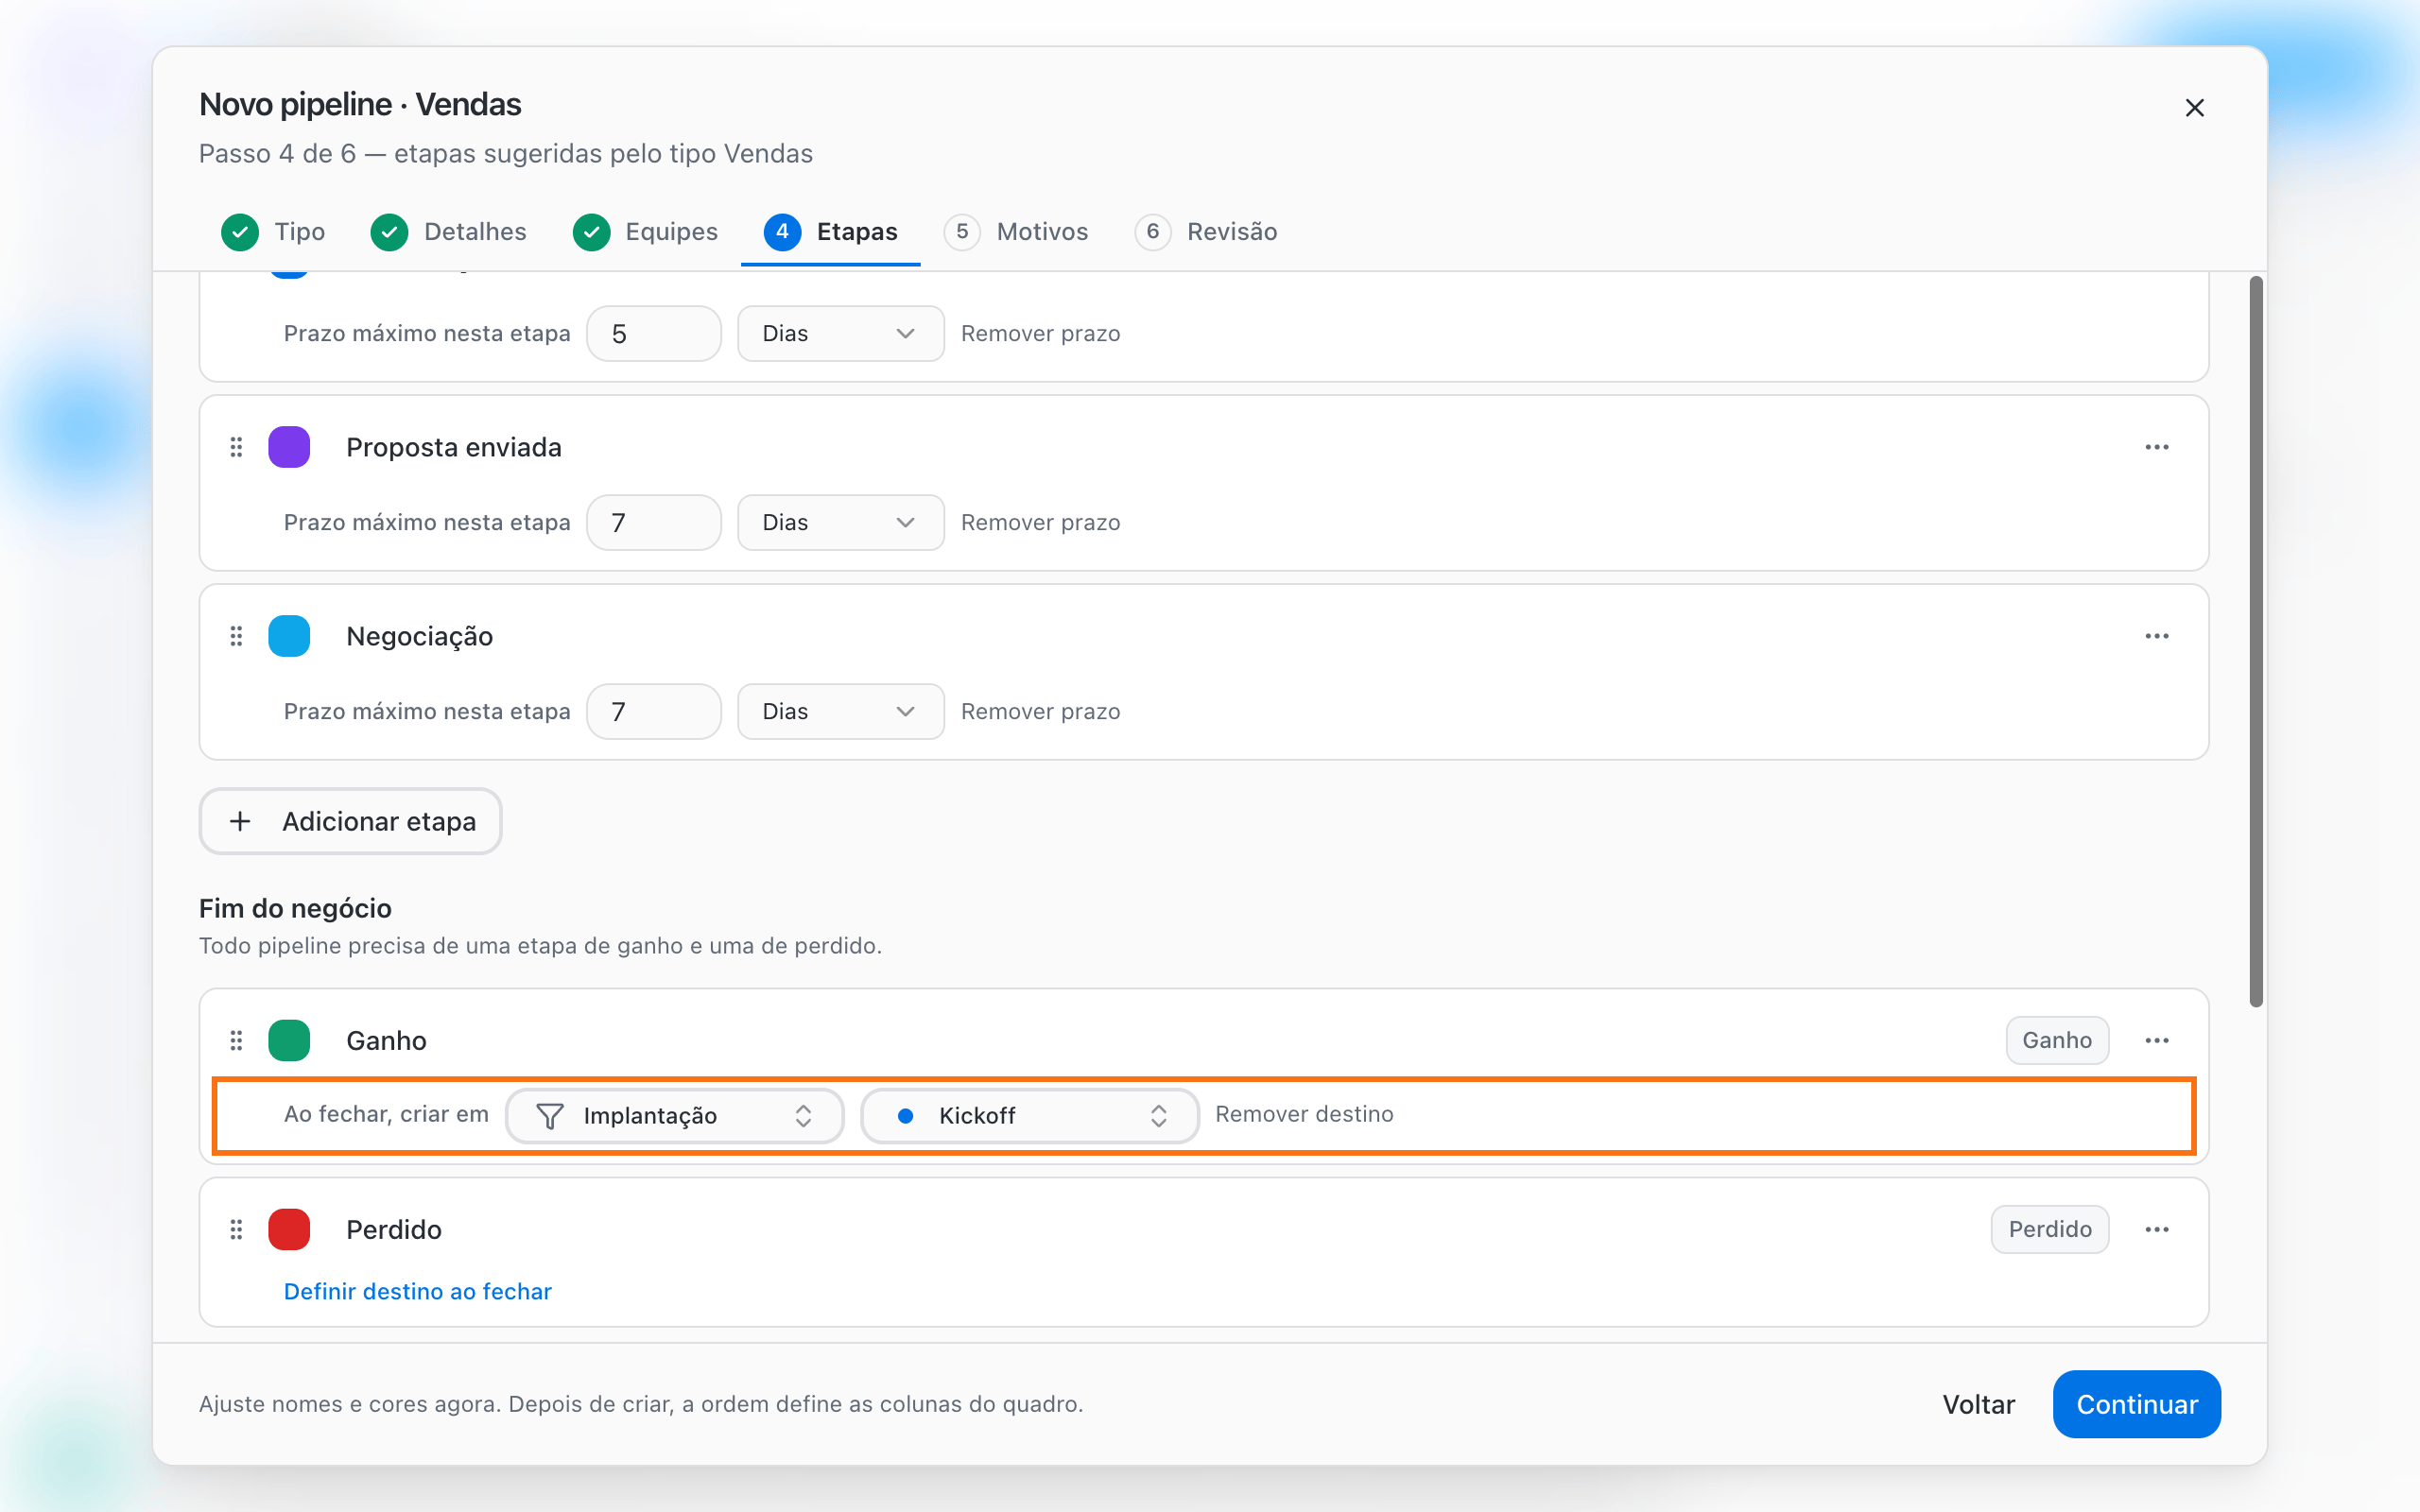
Under Board columns, adjust stage names, colors and order. The order of the list is the column order on the board. Drag to reorder and use Add stage to add new columns.On each open stage, click Set a deadline on this stage to enter a Maximum time in this stage, in Days or Hours. When a deal stays longer than that, its card is highlighted on the board.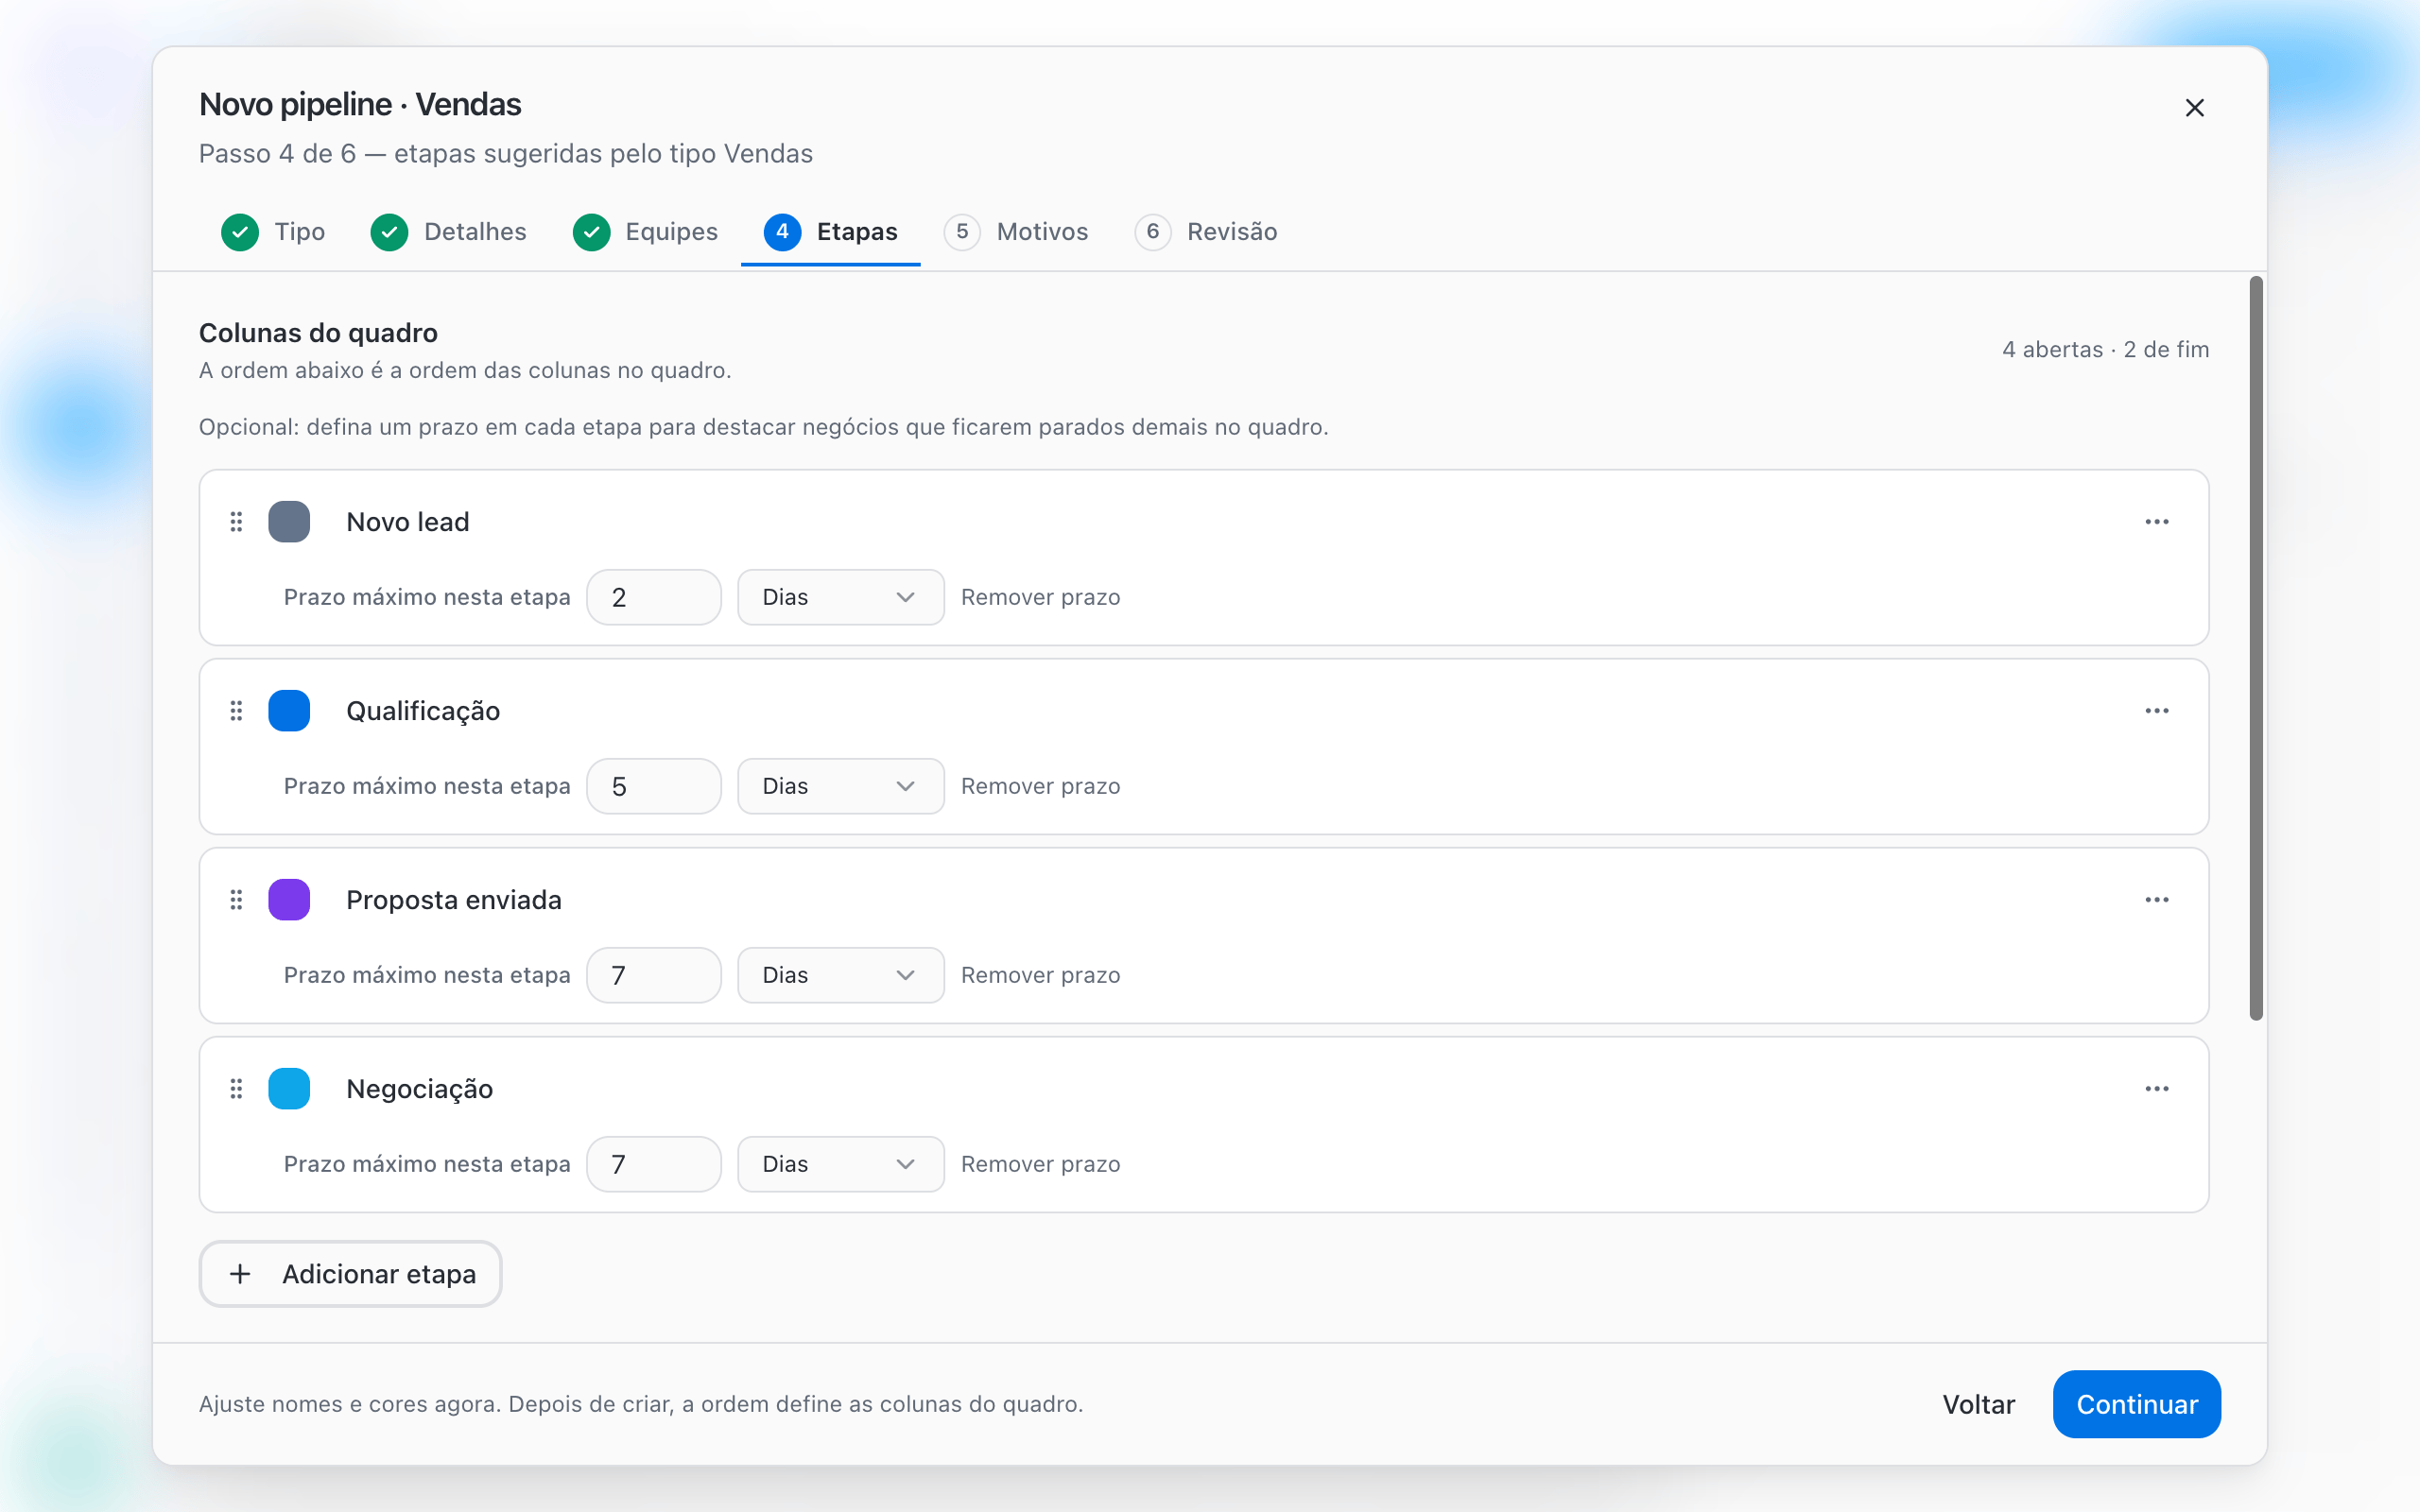
5
Reasons: why the deal was won or lost
Add Won and Lost reasons using names your team already uses every day. Turn on Require reason on win and Require reason on loss so nobody closes a deal without recording why. To require a reason, the list must have at least one reason.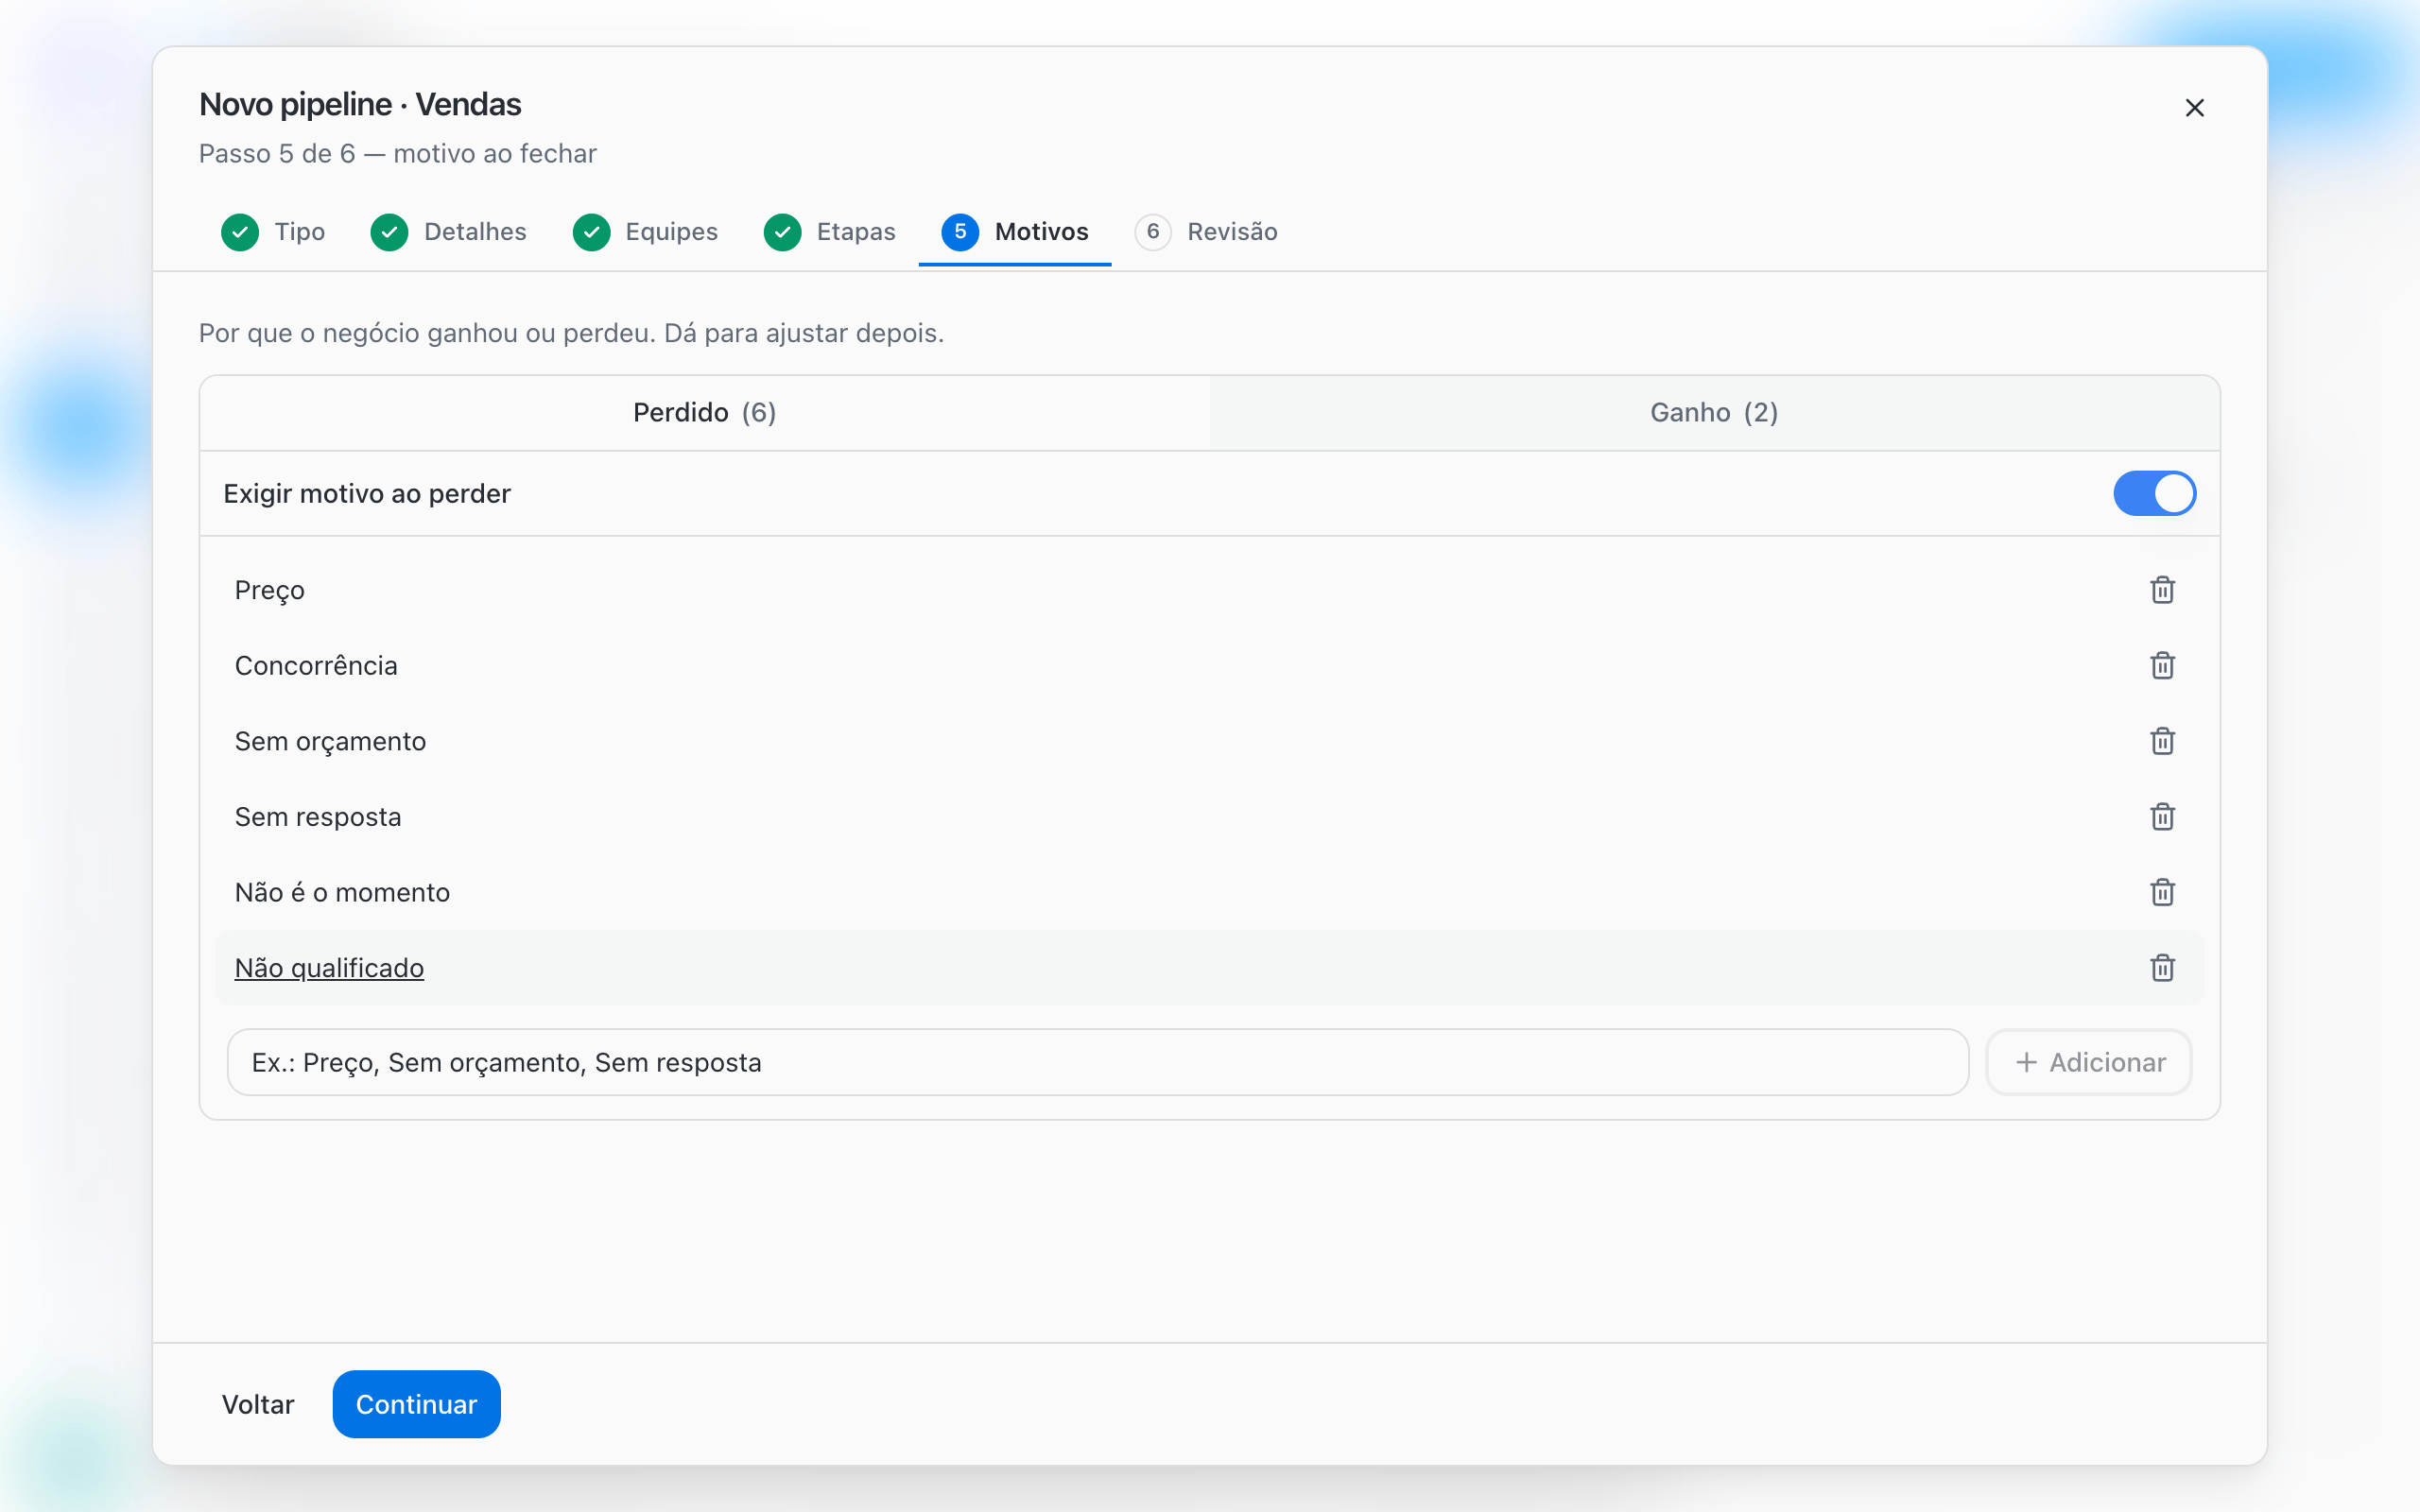
6
Review: check and create
Under Ready to create, check Who can access, Board columns, Deal fields and Close reasons. Click Create pipeline. The setup applies to the board right away.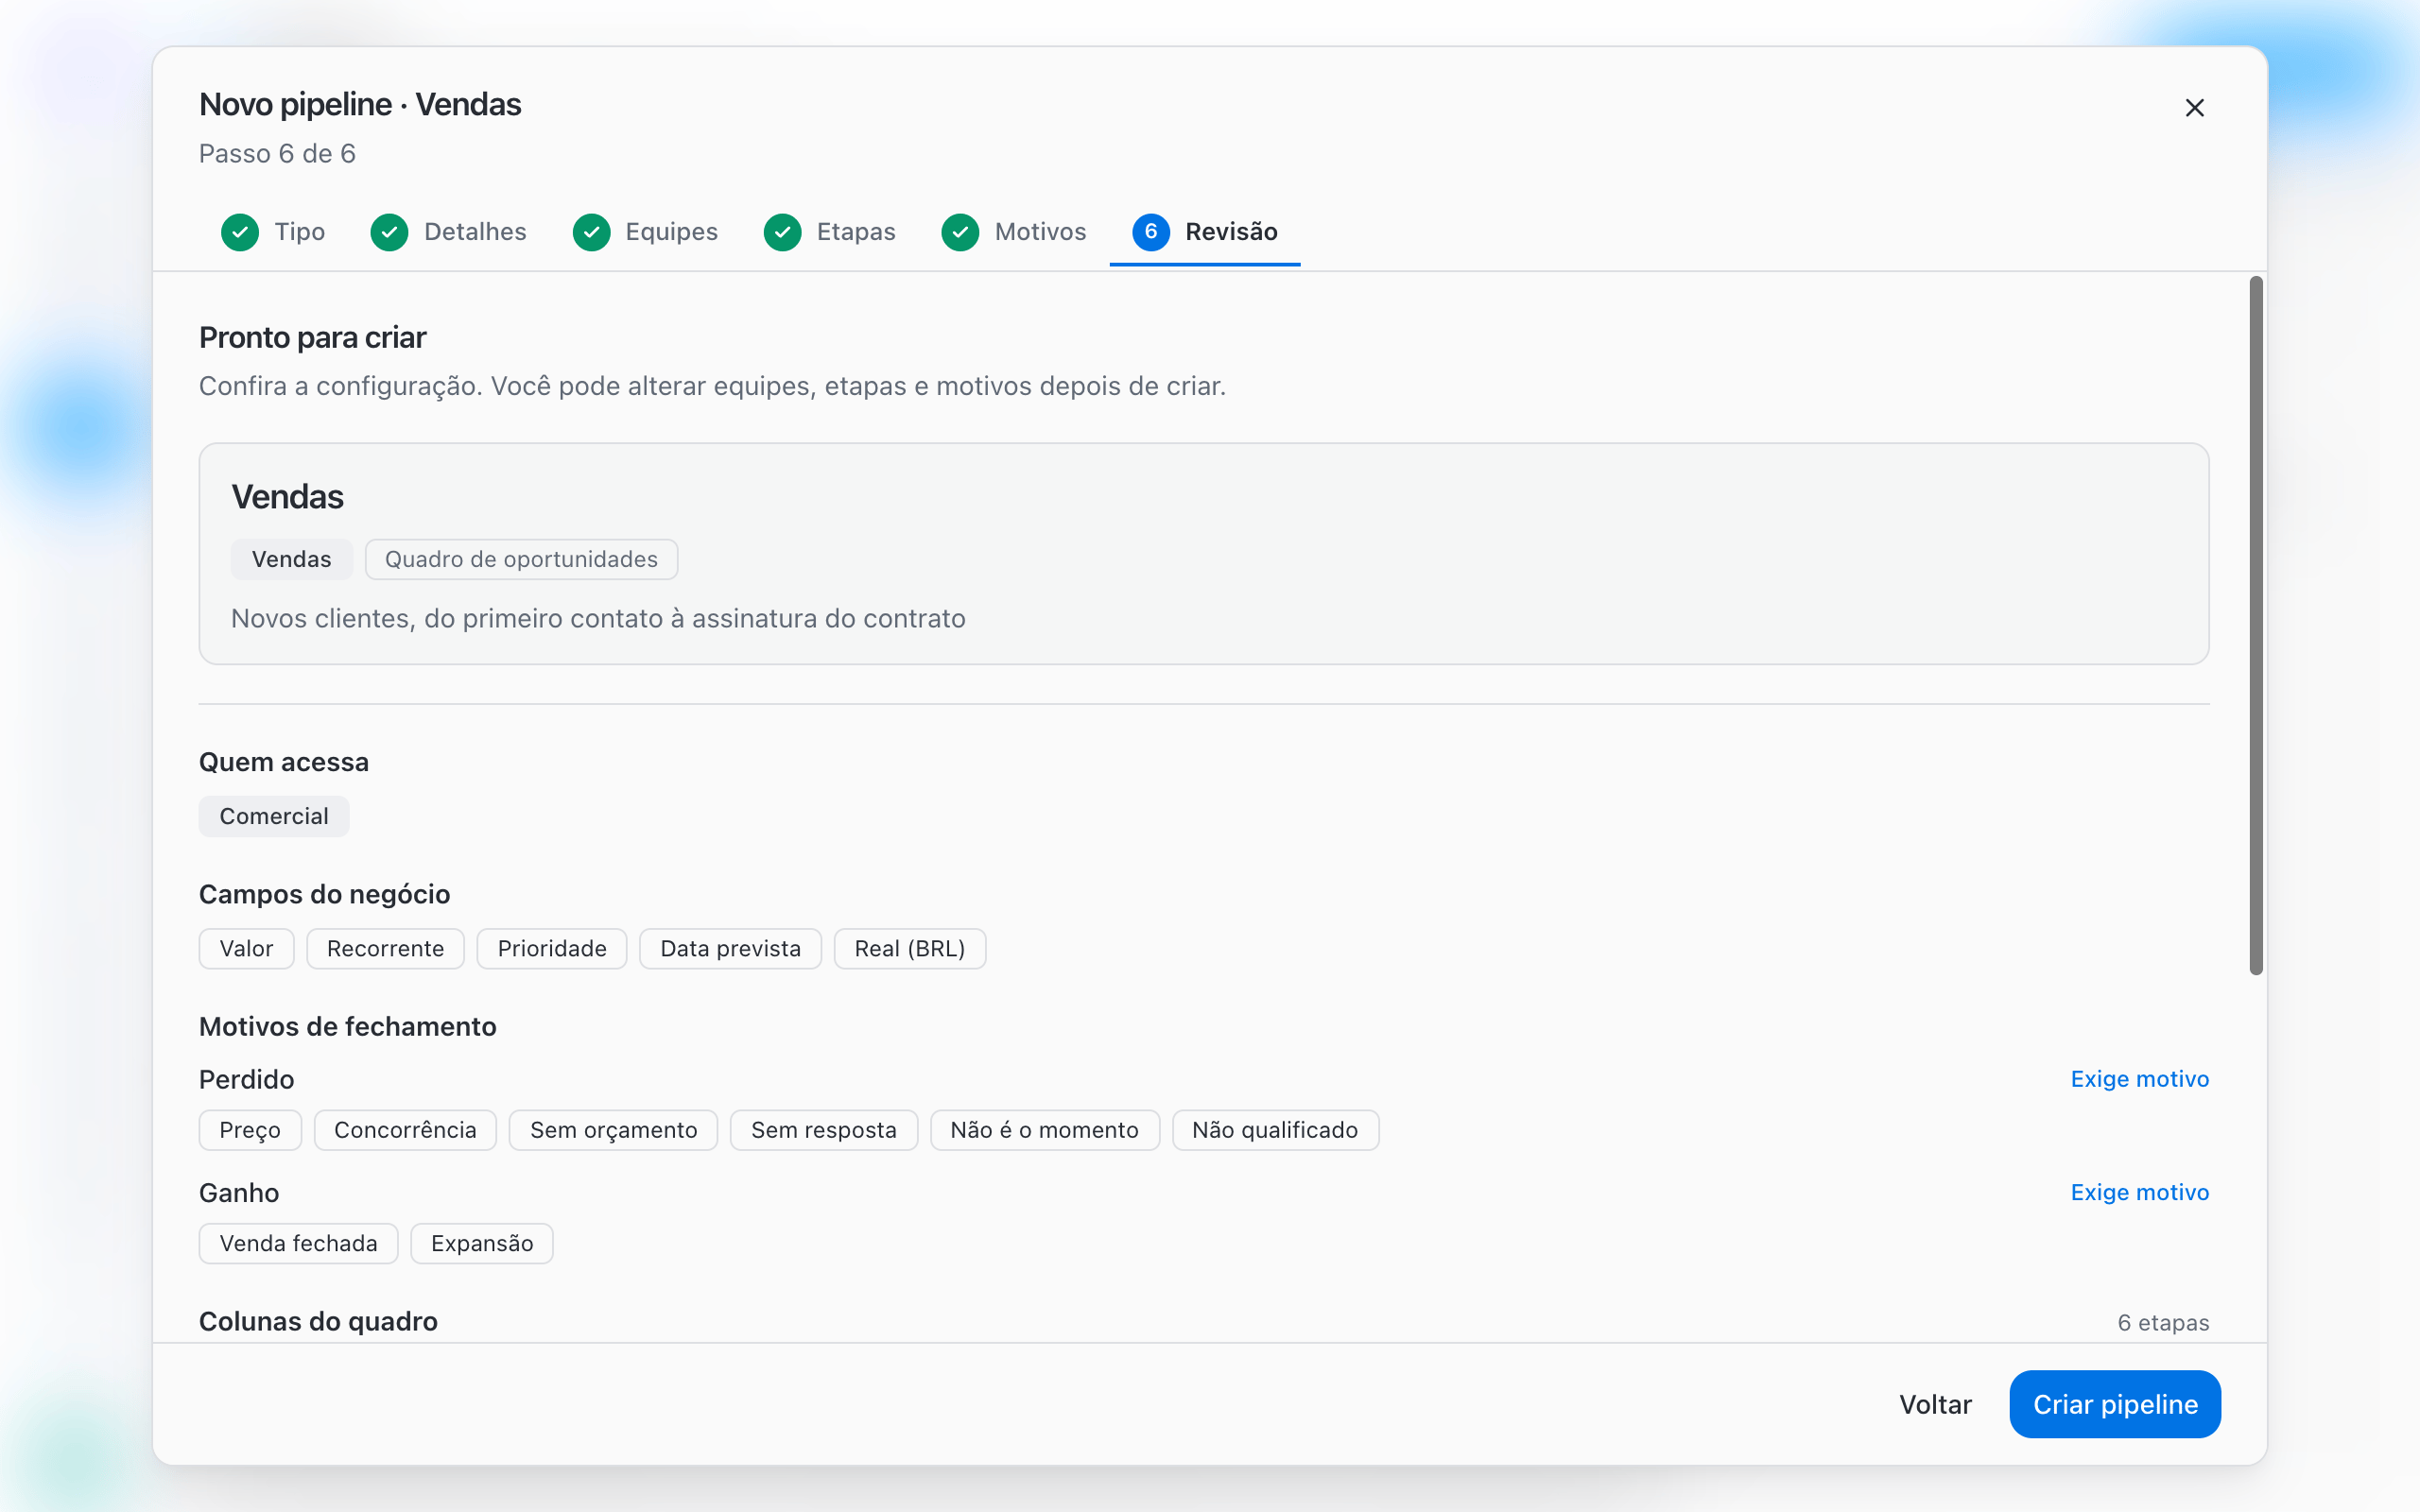
Edit a Pipeline after creating it
On the board, click Pipeline options, next to the Pipeline selector:
Save with Save changes or, on the stages tab, with Save stages.
Limitations and cautions
- Deleting a stage with deals: BluBash asks for an open destination stage and moves the deals before deleting (Move and delete). Won or Lost stages cannot receive those deals.
- Deleting a Pipeline: only allowed when there are no open deals. You confirm by typing the Pipeline name, and the action cannot be undone.
- Unlinking teams: if you are not on a linked team, only an Admin can unlink it.
- No team, no board: a Pipeline only appears to members of at least one linked team.
Best practices
- Start from a template and remove what you do not use, instead of building everything from scratch.
- Set deadlines only on stages where delays are a real problem, such as Proposal sent.
- Review the stages after two or three weeks of use, based on where deals get stuck.
Next steps
Work with deals
How to create, move and track deals on the board and in the conversation.
Won, Lost and reasons
How to set up and use close reasons.